Sunday, November 24, 2013

Chocolate with Caramel

Last weekend, I spent the day with a group of my quilting friends, exchanging fabric, sewing, eating and generally just having a great time!  Everyone brought a potluck and we met at our local library's community room.  For some reason I was in a Chocolate/Caramel mood and so I made a couple of desserts to take along.  Both are considered  No Sugar Added.  There is a small trace of natural sugars in pecans.

First, I made German Chocolate Cupcake Surprise.  I chose this because it is one of my husband's favorites, so I knew I would have to have a few cupcakes set aside for him...if they are his favorite kind...the better I come out in the deal.  These cupcakes are called surprise because from the outside they just look like chocolate cupcakes.  The part that makes them German Chocolate is all tucked in nice and neat on the inside.

 This recipe is going to start out by enhancing a box cake, and end up with a yummy gooey center.

  • 1 chocolate sugar-free cake mix
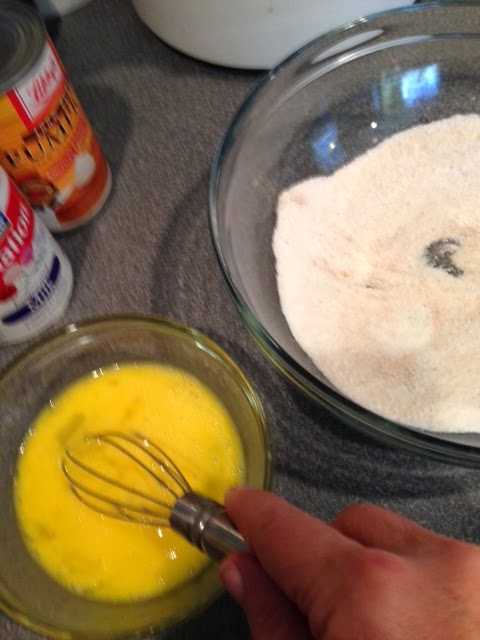
  • 1 c. milk (I used 2%)
  • 3 eggs
  • 1/3 c. vegetable oil
  • 1/2 c. non-fat, plain yogurt
  • 1-2 oz. Torani, sugar-free caramel syrup, (optional)
  • 1/2 jar sugar-free caramel ice cream topping
  • 1/2-3/4 c. chopped pecans
  • 1/2-3/4 c. unsweetened, shredded coconut
  • 1 can chocolate sugar-free frosting


Mix up your cake mix, with the eggs and oil, but substituting the milk for the water.  Additionally, mix in 1/2 c. yogurt.  The milk and the yogurt will help keep your cupcakes extra moist.  I also happened to have some sugar-free caramel syrup in my cabinet (you know, the kind you add to your coffee...) and so I decided to add about an ounce.  If you don't have any of this, I wouldn't buy a whole bottle just for the little bit you need for this.   Bake according to package directions:  325 degrees for 20-22 minutes.

Using a scoop, add the batter to the cupcake liners and fill them about 3/4 full.  You can fill them a little fuller, but you will need to cook them an extra minute or two and you won't get a full 2 dozen cupcakes.
 Remove the cupcakes from the oven, and after a few minutes, remove them from the muffin tin and allow them to cool completely on a cooling rack.  Once cooled, you will need to remove a small amount of cake from the center.  I use the center to my donut cutter, but you can use any tool you might have around your kitchen that would be a small circle.  The centers make great little snacks or you can save and combine them with leftover icing and make some cake balls.
In a separate bowl, mix the caramel ice cream topping, coconut and pecans.  You may have to adjust your amounts slightly.  Just remember that you are going for something that has the consistency of German Chocolate frosting.
Spoon the filling into the cupcake centers.  No need to overfill, but do fill the holes completely.

Lastly, frost the cupcakes, covering the centers as you go.  You can either use a piping bag or you can just frost with a knife or small spatula.  Again, here I took the opportunity to add an ounce or so of the caramel syrup to the frosting.


Somehow I just couldn't stop here.  I felt the need to make some Turtle Brownies.  Although I have seen several recipes out on the internet for this type of dessert, I didn't find them and just kind of winged it myself.

  • 1 box sugar-free brownie mix
  • 1 egg
  • 1/3 c. vegetable oil
  • 3 T. water
  • 1/2 jar of caramel ice cream topping
  • 1/4 - 1/3 c. sugar-free chocolate chips
  • 1/4 - 1/3 c. chopped pecans
First I mixed up a brownie recipe, using the mix, the egg, the oil and the water and followed the directions for baking.  Spray an 8 x 8 pan and bake at 350 degrees for 30 minutes.

Once the brownies come out of the oven, go ahead and start adding the "turtle" ingredients on top while the brownies are warm.  Drizzle the caramel ice cream topping over the top.  A half jar should allow you to cover the entire top of the pan.  A couple of handfuls of chocolate chips and a couple of handfuls of chopped pecans will top it all off.
After the brownies cooled, I put a lid on, or you could cover with plastic wrap and I stored them in the fridge.  This just allows them to set up really well and they will last longer, well, if your family doesn't eat them all up!

Tuesday, November 12, 2013

Pumpkin Pie

It's time for more pumpkin!!  Mmmmmm...pumpkin pie.  You know that you are going to want pumpkin pie for Thanksgiving dinner...believe me... this is going to be good.  I am even going to go as far as to say that you can make this pie, and not tell anyone it is  No Sugar Added,  and no one will even know.  This is not a secret or special recipe.  It is the one that you get off of the pumpkin can.  A simple Splenda substitution is all you need.

 For the crust:
*1 1/4 c. flour
*1/4 t. salt
*1/3 c. shortening
*3-4 T. water

For the pie filling:
*3/4 c. Splenda
*1/2 t. salt
*1 t. cinnamon
*1/2 t. ginger
*1/4 t. ground cloves
*2 large eggs
*1 15oz. can of pumpkin
*1 12oz. can of evaporated milk

You are more than welcome to use a prepared pie crust.  I do it quite often but just didn't happen to have one this weekend.  Pie crust is an interesting thing in my family.  My mom always used the same recipe for pie crust, and so of course that is the recipe that I always used.  One year at Thanksgiving, we were getting ready to make the pies and either my mom or my sister asked me why I was getting out the vinegar (one of the ingredients in our "family" pie crust recipe).  So I said that I was getting ready to make pie crust.  They took that moment to tell me that "We don't use that recipe anymore.  Here is the one we use now."  So I asked them how long they had been using this "new family pie crust recipe".  "Oh, I don't know.  For a while now."  I cannot tell you how upset I was that no one bothered to inform me that we had a "new family pie crust recipe".  So, in protest, I neither use the "old" nor the "new" recipe.  I have found my own.
First you mix the flour and the salt in a medium-size mixing bowl.  Add the shortening and cut it in with a pastry cutter.  If you don't have one, you could use a fork.  Next you add the water, but only 1 tablespoon at a time.  After each addition of water, mix it around with a fork and start to incorporate the water and flour.  Unless it is just an extremely humid day, you will probably use the entire 4 tablespoons of water, but still only add it one tablespoon at a time, just to be sure.  You certainly don't want to have too much.  Once the flour is incorporated, use your hands to bring it together and form it into a ball.
 Turn your dough out onto a floured surface and after flouring your dough, your hands and your rolling pin, roll the crust out into a large circle.  Roll the dough up onto your rolling pin and transfer to your pie plate.  Trim off any large amount of hangover, but leave about an inch extra to turn under.  Use the thumb of your right hand and the thumb and forefinger of your left hand to crimp the edges of the crust around the pie.  I love that part, because it makes the pie look so pretty!
 Now that your crust is ready, you can mix up the filling.  In a mixing bowl, measure out all of your dry ingredients.  Beat your eggs in a small bowl and then add to your mixing bowl and incorporate them.  Next, add in the can of pumpkin and mix well.  The last step is to slowly pour in the can of evaporated milk while incorporating using a whisk.  This is going to give you that pretty light orange color.
 Slowly pour the filling into your prepared pie crust.  I think it is important to use a deep dish pie plate for this as it makes quite a bit of filling.  I think that if you have a shallow one, it might over flow, or you will have filling left over.

Bake this pie in two segments.  First bake it at 425 degrees for 15 minutes.  Then turn the temperature down to 340 degrees and bake it for an additional 50 minutes.  I put a pie shield on my crust for the last 15 minutes to keep the crust from burning.
Once you take the pie out of the oven, put it on a cooling rack for a couple of hours. Serve and enjoy!
If you have any leftovers, store in the refrigerator.
I hope you all will give this a try...see how many people you can fool!  Happy Thanksgiving!

Sunday, November 10, 2013

Strawberry Daiquiri Cupcakes

A couple of years ago, when cupcake bakeries were opening on every corner, I became frustrated because none of them were serving sugar-free versions.  It seems like many are serving gluten-free, but of course we know that that is not my issue.

As I started experimenting with some different flavors, I wanted mine to be as exciting as some of the luscious flavors at those bakeries.  And so I started brainstorming and my mind started thinking of drink flavors.  I have made margarita, pina colada, root beer float and strawberry daiquiri.  I have done each of them in a couple of different ways...just looking for the perfect combination.

Last week when it was my turn to take snacks to one of my quilt guild meetings, I decided on strawberry daiquiri.  Here's what I did to get some great  No Sugar Added  cupcakes.


  • 1 sugar-free yellow cake mix
  • 1 box sugar-free strawberry gelatin
  • 1 cup no-sugar-added strawberry daiquiri mix (the brand that I found was Master of Mixes)
  • 3 eggs
  • 1/3 cup vegetable oil
  • 1/2 cup plain, non-fat yogurt
  • 1/2 can of sugar-free vanilla frosting
  • 6 oz. of sugar-free whipped topping
  • fresh strawberries 


Start by adding the cake mix and the gelatin powder to a large mixing bowl and whisk together.  This is a great trick for any flavor that you would like to make, whether it is cupcakes or just a cake.  Since the sugar-free cake mixes only come in yellow and chocolate, add a box of sugar-free gelatin in any flavor to change the flavor of your cake.

Mix in the eggs and oil as directed, but substitute the strawberry daiquiri mix in the place of the water and add in the yogurt to keep your cupcakes nice and moist.  Mix well with a whisk.  You can use an electric mixer if you would like to.


 Add your cupcake liners to your muffin tin.  If you would like to get a full 2 dozen cupcakes, then follow the directions and fill your liner papers about 2/3 full.  I really like to try and get the bakery look of large cupcakes, so I fill mine almost full.  You won't get quite as many this way, but I did get 17.

Bake according to the package directions:  325 degrees for 20 minutes.  Once they have come out of the oven, remove from the pan and cool on a rack until completely cooled.
So, this is where I started to have a little fun.  In order to get that light whipped cream look, I only used a half can of icing and I used the electric mixer to mix in about 3/4 a container of sugar-free Cool Whip.
I used a pastry bag to ice the cupcakes. While the cupcakes were cooling, I rinsed the strawberries and let them drain on a paper towel.  I used a small pairing knife and made slits in the strawberries and added one to the top of each cupcake.  For the final fun touch, I cut some straws into short 3 or 4 inch pieces and stuck them in the top to resemble a drink.
They were a big hit and they tasted really good too!  Use your imagination and see if you can come up with some other fun "drink" cupcakes.

Sunday, November 3, 2013

Pumpkin Bread

It's FALL!  The chill is definitely in the air and while in general, cooler weather is not exciting to me...the one thing that I LOVE about fall is...pumpkin!  It shows up everywhere.  I couldn't believe it, but a few places even started having pumpkin flavors out in September.  One of my favorite things is pumpkin ice cream, and of course I have to be very careful with that, but always try to get by with a few bites.  This year, I was so excited when I went one afternoon to get a frozen yogurt and they had pumpkin!!!  Yeah!  It is delicious and I don't have to worry about it hurting my tummy.  Maybe one day I will see if I can figure out how to make my own pumpkin frozen yogurt.

The one thing that I know I can make is pumpkin bread.  I am not sure where this recipe came from, but it is the one that I got from my mother and the only one I have ever used my whole life.  I have converted this recipe to a  Low Sugar  recipe.  Of course, as we have discussed before, the raisins have some natural sugar, but also, this recipe uses brown sugar.  The Splenda Blend product is a half and half product, but also you use only half the amount that your recipe calls for.  So, that means that the amount of sugar is 1/4 that of the original recipe.

So here is the converted recipe:

  • 1 c. canned pumpkin
  • 1/2 c. Splenda Blend brown sugar
  • 1/2 c. Splenda, granulated
  • 1/2 c. vegetable oil
  • 2 eggs
  • 1/2 c. no-sugar-added applesauce
  • 2 c. flour
  • 1 t. baking soda
  • 1 t. baking powder
  • 1/2 t. salt
  • 1/2 t. nutmeg
  • 1/2 t. cinnamon
  • 1/2 t. ginger
  • 1/4 c. water
  • 1/2 c. raisins
  • 1/2 c. chopped nuts, optional

 In a large mixing bowl, combine the pumpkin, sugars, oil, and applesauce.  Mix until smooth.  I guess that you can use a mixer if you want to, but there really is no need.  A wooden spoon or spatula will work just fine and they mix fairly easily.
In a small bowl, beat the eggs and then add them to the wet mixture and incorporate them.
Next add the dry ingredients to the bowl and stir in.
Finally add the water, raisins and nuts (if desired).  Now I will give a personal commentary here:  I don't think that you can ever have too many raisins.  So you could add up to a full cup of raisins if you are a raisin lover like me.
 Well-oil or well-spray a loaf pan and add batter.
Bake at 335 degrees for 55 minutes.
 This is going to make your house smell amazing.  I love the warmth of the cinnamon and nutmeg.  After removing it from the oven, let it sit in the pan for 5-7 minutes.  Run a knife around the edge and turn out onto a cooling rack.
Now I don't know about you...


...but I can't ever wait for it to cool, and I always hope that maybe just a little spot in the middle didn't quite get done and is still just a little gooey.  So I just cut it right through and take my nice warm piece right out of the center.
Just as a preview, know that there will be more pumpkin flavors as we get closer to Thanksgiving.  Why don't we eat pumpkin year round...???