Saturday, September 28, 2013

Creamy Scones

I have often had a love-hate relationship with scones.  I really like the ones with fruit; well, I really like the ones with fruit in them that aren't dry and crumbly.  Any of you that have had scones before may know just what I am talking about.  It always seemed so inconsistent, from bakery to bakery and maybe even from time to time at the same bakery.

A couple of years ago, a new French bakery opened in our town and one morning I tried their orange scones; moist and delicious.  I had them another time; moist and delicious.  So, my love-hate relationship turned to just love. I could get scones any time I wanted to and enjoy them...unless of course other people had wanted them as much as I did and they were sold out when I went in.

This last summer, my daughter went on a lengthy trip to the UK and of course had some amazing scones.  After she came home, we decided that we really needed to find a great recipe for scones so that we could make them anytime we wanted ... and we did.  This recipe came from Smitten Kitchen ... and the scones are made with cream.  How could they be bad?

They really have very little sugar in them at all, so the Splenda substitution didn't require much.  I also substituted in I Can't Believe It's Not Butter  and all is still wonderful.  This is a  No Sugar Added  recipe, as there are some natural sugars in the fruit you choose to add.

2 c. flour
3 1/2 t. baking powder
3 T. Splenda, + a small amount for sprinkling
1/2 t. salt
5 T. I Can't Believe It's Not Butter, chilled & cut into small cubes
Fruit and/or flavorings of your choice, approx. 1/2 c.
1 c. heavy cream

Preheat your oven to 425 F.  Mix your dry ingredients in a medium mixing bowl with a whisk.  Cut the butter in with a fork or pastry blender.
 Stir in your fruits and flavorings at this point.  For this batch, I chose orange zest and dried cranberries.  (You can get reduced sugar dried cranberries.)
I have made other flavors in the past:  lemon zest and blueberries, cinnamon and raisins.  You should use your imagination here; I am sure that the combinations are endless.  You could even make some savory flavor combinations as well.
 Once the fruit is mixed through, add your cream.  Mix it in with a fork, but do not stir vigorously.  Just stir until all dry ingredients are incorporated.

Note:  As I started to make these, I didn't have any cream, but I did have some fat-free half n half.  I substituted this ingredient and they were still wonderful!  And I'm sure I saved a few calories as well.

Dust your counter with flour and turn the dough out.  It will be very sticky.  Softly knead the dough and incorporate some more flour until dough is no longer sticky.  There is no need to roll this dough; simply work it with your hands and pat it into a circle about 3/4" thick.
 At this point you can cut them out with a biscuit cutter or a glass, but I have this unreasonable idea that scones should be a different shape than round, so I just cut mine into triangles,  But you should try some other shapes too; maybe a fun cookie cutter.


If there is a little cream left in that measuring cup, don't let it go to waste.  Brush the tops of the scones; it will help them get nice and golden.
And just to make them shine a little, sprinkle just a bit more Splenda on the top.

Bake for 15 minutes.  As you can see, you get a beautiful golden color and they are just a little rustic looking.  A little more I Can't Believe It's Not Butter, melting in while they are warm out of the oven... It was a good breakfast.  So good, I went ahead and had two ... well maybe by the end of the morning and several nibbles later it was closer to three...

Chocolate Banana Chocolate Chip Bread

One day last winter, I was watching Paul Deen one afternoon and she was doing a show on chocolate..Well of course she had my attention; what girl doesn't love chocolate.  One of the recipes she was making was a Chocolate Bread.  So I started writing down the recipe, and by the time the bread came out of the oven, I was in my kitchen thinking that I needed to make this bread!

So the first problem I had was that I was out of cocoa...Really??  Who ever RUNS OUT of cocoa?  I wasn't ready to give up quite so easily and so the scouring of my pantry began, looking for what I had that was chocolate.  The first substitution I made to the recipe was for the chocolate chips; I did have white chocolate chips and I decided that would be pretty.  Then I found some chocolate almond bark left over from the last time I had dipped pretzels; maybe that would work.

I substituted some melted almond bark for the cocoa and as I was mixing up the batter, I noticed I had a rather ripe banana on my counter.  Since I was using Splenda in my version, I decided that the batter could use a little more moisture, so I mashed up the banana and threw it in.  So for my first try, the white chocolate chips were heavy and pretty much sank to the bottom, but my husband fell in love with this bread!

The next time I went to the store, I bought some cocoa.  He happened to be home when I started to mix up the batter again, and I mentioned the substitution.  He wasn't going to stand for it...whatever I did the first time, I had better do again, because he loved that bread!  I used the almond bark again and I waited to add the chocolate chips until after the first 10 minutes of cooking...Perfect!  My husband starting buying bananas every time he went to the store and made sure it was known that they had better not all get eaten; some WOULD get too ripe and then there would be no choice but to make this bread.

So even though this bread has been successful for me, it would be a  Reduced Sugar  recipe.  As you can imagine, there is quite a bit of sugar in the almond bark and some sugar in the white chocolate chips.  So, I have made this recipe with the cocoa and with sugar-free chocolate chips.  These substitutions make it a  No Sugar Added  recipe, since there are natural sugars in the banana.  Both versions are decadent, but you can taste the difference in the richness of the version with the almond bark.  So...pick your pleasure, depending upon your own personal sugar needs; they are simple substitutions and don't change the recipe otherwise.

2 1/4 c. flour
2 c. Splenda
3/4 c. cocoa  or  4 sq. chocolate almond bark, melted
3 1/2 t. baking powder
1 t. salt
1 c. vegetable oil
1 1/2 c. milk (I have used 2%)
3 eggs
1 t. vanilla
2 ripe bananas, well-mashed
sugar-free chocolate chips  or  white chocolate chips


After whisking together all of the dry ingredients in a large mixing bowl, add the wet ingredients and mix well.

Mash the bananas in a separate small bowl.  The more you mash them the more incorporated they will be into the batter.  Add to the batter and mix well.

 Spray two loaf pans well and preheat oven to 300 F.  Bake the bread for 10 minutes.

Remove the pans from the oven and sprinkle the chocolate chips all over the top of the bread.  Allowing the bread to bake for this short time, allows it to set just enough that the chocolate chips will stay on the top.  (Since this recipe makes 2 loaves, you'll notice that I put the sugar-free chips on one loaf and the white chips on the other loaf...gotta keep the hubby happy!)


Return the bread to the oven and bake for an additional 60 minutes.

All I can say is .... Mmmmmmmm....Warm, chocolatey, banana bread...pretty decadent.

Tuesday, September 17, 2013

Spiced Pear Jam

Last weekend I went to the farmer's market to get some fresh veggies for a salad.  I had a couple of friends coming over for lunch and I was able to get some fall lettuce, a huge tomato, and some cucumbers.  As I was walking back to my car, I saw a stand selling fruit and they had some pears.  I decided that it might add some crunch to my salad, so I got a small container.  I chopped one up and put it in the salad and we all enjoyed it very much.  After my friends left, I was cleaning up the kitchen and there sat 6 more pears.  I had to decide what to do with them.

Earlier in the summer, I had purchased Taste of Home, Special Edition, Canning & Preserving, Summer 2013 magazine.  I spent quite a bit of time this summer reading the magazine and thinking about and experimenting with some  No Sugar Added  jams and marmalades.  I made some Pina Colada Marmalade, as well as some Peach Jam.  The magazine had great recipes with wonderful combinations of fruit, but of course they were all filled with large amounts of sugar.  So some investigation on the Splenda website and looking at their Splenda recipes of jams and jellies, allowed me to make some generalizations on fruit quantities and proportions to Splenda, liquids, and pectin.

I remembered from my reading that there were a few recipes in my magazine that had pears, so I found my magazine and one of the recipes that caught my attention was Spiced Pear Jam.  It just sounded warm and fall-like.  So I dug out my notes from the summer on quantities and proportions and this is what I came up with.


  •  3 or 4 ripe pears, chopped, approx. 4 cups
  • 2 T. lemon juice
  • 3/4 c. water
  • 3 T. low sugar/no sugar pectin
  • 1/2 t. cinnamon
  • 1/4 t. ground cloves
  • 1/2 c. Splenda
Many people believe that homemade jam is difficult to make.  It does have quite a few steps, but they aren't difficult.  You can make a small batch like this one in an hour or less.
Peel, core and finely chop the pears.  Add lemon juice to pears and stir to coat.  This will help keep the pears from turning dark.


Add the pears, the water and the pectin to a medium saucepan. -- A side note about the pectin.  You can find the special Low Sugar / No Sugar pectin in your canning section at the grocery store.  Be sure to use this special pectin when working with sugar substitutes of any kind. -- Stir until well combined.  Add the spices and mix in.  Your heat should be on medium-high.  Bring the mixture to a full, rolling boil.  That means that even when you stir it, it continues to boil.  Set your timer and boil for 1 minute.


Remove your pan from the heat and add in the Splenda.  Stir to combine.  You may notice that the Splenda will have a tendency to clump just a little.  Simply use your spoon to press any clumps up against the side of the pan and they will mix in.


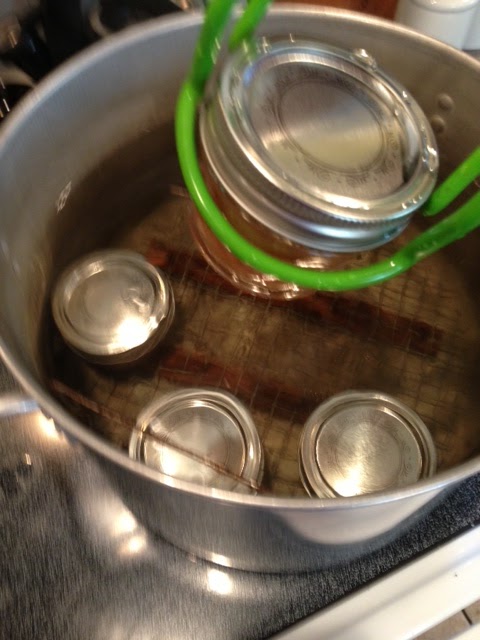
 In the meantime, you want to sterilize your jars.  I use a big canning pot that I got from my husband's grandmother.  It even has an old fashioned rack in the bottom.  I just fill it about 2/3 of the way with water and put it on the stove to heat up before I even start peeling and preparing the fruit.
If you are not great at multi-tasking, you may want to get your water heated up and sterilize your jars before you start.  But once you have your jars sterilized, keep your water hot for your hot water bath at the end.  No need to heat that water up twice!
You don't have to leave the jars in the water very long; just a few minutes and they will be nice and hot.  You can remove them from the water with a pair of tongs and set them on a clean towel to dry.
 Once your jars have dried and your fruit is completely mixed up, ladle your fruit into the jars.  I like to use small 4 oz. jars for a couple of reasons.  First, with my daughter gone to college, I am the only one in my house that eats fruit jam; my husband is a grape jelly kind of guy.  Second, my experience with sugar-free jam, whether you make freezer jam or hot water bath canned jam, is that it tends not to last as long once you open it as those jams made with full sugar.  It will last 2 or 3 weeks, and maybe a little longer.  But with it just being me, I like the small jar so as not to waste.  And besides, those little jars are so cute and they make wonderful gifts!
I use a gravy ladle and I get about 3 scoops in the 4 oz. jar.  Use a funnel and it will be much less messy.  Don't forget to leave 1/4-1/2 inch of head space.
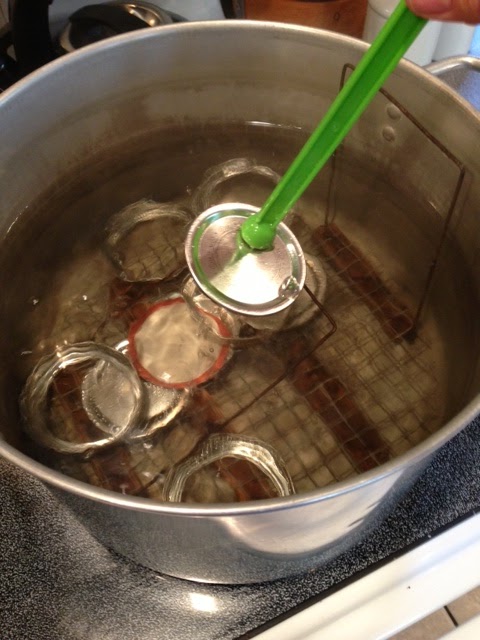
 Before you start filling your jars, put the lids and rings in your pot of hot water to sterilize them.  Once the jars are filled, pull out the lids and place on top of each jar.  Then place a ring and twist on.  You don't have to put it on too tight.  I just got this great little tool you can see in the picture; it's a plastic stick with a magnet on the end.  It really made it easy to pull those lids and rings out of the hot water.  I have used tongs in the past and they work fine, but this was just even easier.


Put the jars onto the rack and lower the jars into the boiling water.  Set the timer for 10 minutes once the water is back to boiling.  After a 10 minute Hot Water Bath, remove the jars and set back onto your towel.
This is my favorite part; waiting for the lids to pop!  When I was young and my mom was canning, she always gave me and my sisters the job of counting the lid pops to make sure that every jar had sealed....I still love counting the pops!
Once the lids have all popped, you just have to let the jars sit until they cool.  Doesn't the jam look pretty in the jars?  And it tastes good too!  There was just about a spoonful left after I filled the jars and I couldn't let it go to waste.  But I certainly can't wait to try some of this on hot biscuit on a lazy Sunday morning!
This recipe made 7 half pint jars.  And oh by the way, don't forget your label.  You can buy a roll of these cute labels in your canning section.  They are especially made to wash off easily when you wash your jars.
You can use this basic method to make other fruits into jams.  I made peach jam this summer and the only thing I did differently was that I didn't add in the cinnamon and cloves.  But you know...that might taste pretty good...peach pie jam....
Now do you see how these ideas just keep popping into my head!

Monday, September 16, 2013

Chocolate Covered Cherry Cupcakes

So, a couple of years ago, I joined the cupcake bandwagon.  Around my area, 2 or 3 new cupcake bakeries opened up and I was frustrated because they were really sweet and I knew that I shouldn't be eating that much sugar.  When I really started to look, this is when I found the Pillsbury sugar-free cake mixes.  I felt like now I could make any cupcakes.  I wanted to make cupcakes with all of the fancy flavors like you could find at the specialty bakeries.  So I talked to a few people about making cakes with mixes and I got a few ideas from some different friends.  I sat down and started to brainstorm about different flavors that I could make and just how to do that.

Enhancing a boxed cake mix is pretty simple.  Several people I spoke to used milk for the liquid instead of the water called for on the box.  Others I spoke to added mayonnaise to a boxed cake mix for additional moisture.  (If you are not familiar with that concept, mayonnaise cakes are quite common in the south.)  I knew that I didn't want to add mayonnaise; one, because I don't care for mayonnaise in much of anything, even though I know you can't taste it mixed into the cake; and two, because I didn't want to add that high number of calories to my recipe.  I ended up thinking of adding plain, non-fat yogurt.  Once I realized that I could use any liquid in place of the water, my imagination started running wild.  I promise I will share all of my varieties with you over time.

The cupcakes we are making today came about for my daughter's 21st birthday.  Cherry is her favorite flavor and well...what girl doesn't love chocolate!  Even though she is away at school, I'm sure a few of these will make their way into the freezer to await her next trip home.  This is a  No Sugar Added  recipe; there are some natural sugars in the cherries and in the milk and yogurt.

Let's get started:

  • 1 box Pillsbury sugar-free Devil's Food cake mix
  • 1 1/4 c. milk (I use 2%, just because that is what I keep in my fridge)
  • 1/2 c. vegetable oil
  • 3 eggs
  • 1/2 c. plain non-fat yogurt
  • 2 dz. cupcake liners
  • 1 can of no sugar added cherry pie filling
  • 1 can Pillsbury sugar-free Chocolate Fudge frosting
  • 1 pkg. (2 quart size) sugar-free cherry drink mix
First, mix up the cake mix, basically following the directions on the package.  Substitute the milk for the water and add in the yogurt.  You can mix it with the mixer, but I don't ever take the time to get it out.  I just use a big whisk and it is mixed before you know it.

Line your muffin tins with cupcake liners.  Fill the cupcake liners about 3/4 of the way full.  I know the package always says to fill them 2/3, but I really like my cupcakes to rise to the top of the liners, so I fill them up just a little more.  You might not get a full 2 dozen, but 22...24...is there really much of a difference?

Bake the cupcakes according to package directions.  I baked mine at 325 F. for 22 minutes.  Check them with your favorite method, as you don't want these cupcakes to be gooey in the middle.  Cool a few minutes and then remove from the pans and place on a cooling rack to cool completely.

In the meantime, you can prepare your frosting.  At first I was a little bummed that I only had two flavors of sugar-free frostings to choose from.  Then one day while I stared in my pantry looking for something, I saw a variety of sugar-free drink mixes and the light bulb went off.  I could add any flavor of drink mix to the vanilla or chocolate frosting and come up with an endless variety of frostings.  I don't think there are enough days in the year for me to try all of the possible combinations.  In a small mixing bowl, empty out the frosting and one packet of cherry drink mix.  You can use the mixer to mix the flavor into the frosting, or a simple spatula and a strong hand will mix it together just fine. If it has been a while since you used powdered drink mixes, don't forget...they WILL stain your hands.  Set aside.

Once the cupcakes are completely cooled, cut a section out of the top to add the yummy cherry filling.  There are tools that you can buy to cut out a section of the cupcake and some of you may have one.  I don't, but I do have an old biscuit/donut cutter that I helped myself to from my mom's kitchen when I moved out.  The center is removable so that you can cut out biscuits.  It is the perfect size.  I just use that center piece and punch it down through the center of the cupcake.  Works like a charm!  You can save the cake centers for something else, or maybe just for nibbling.

Next, using a spoon, fill up those centers with cherry pie filling.  You don't want to overfill it, but make sure that you get at least a couple of cherries in there and fill it up even with the top of the cupcake.  Don't you know that when you bite into that cupcake, it is going to be just like biting into a chocolate covered cherry and tasting that oozing center...mmmm....I can taste it already!  But not yet....

We have to frost the cupcakes.  You can just use a knife or a spatula; or if you want something a little fancier, you can use a piping bag filled with the cherry chocolate frosting.  I like to use the bags.  They have them at my local grocery store and I have picked up some various decorating tips throughout the years.  You can even use a zip bag and just snip a little corner to squeeze the frosting through; just be sure it is zipped tight.  Somehow just this extra touch makes me feel like I am eating a cupcake from one of those great bakeries.

I had better put a few of these in the freezer for my daughter before my husband gets home from work! 

Sunday, September 15, 2013

Sugar Cookies

I know, I know....Just the idea of  "sugar-free"  sugar cookies sounds like an oxymoron; but it can actually be done.  I came across this recipe a couple of years ago and have been making my favorite holiday decorated cookies and so far, everyone seems happy with the outcome.  Even my daughter's friends at college really like these cookies.  I am not sure where I got this recipe, and although I have searched the internet and found a couple that were similar, I did not find this exact one.

  • 1 c. (2 sticks) I Can't Believe It's Not Butter
  • 3 c. Splenda
  • 2 eggs
  • 4 t. vanilla
  • 3 c. flour
  • 1 t. baking powder
  • 1/2 t. salt
Start by beating the butter in a large mixing bowl.  Add the Splenda a little at a time and beat well.  Once you have incorporated the Splenda into the butter, add the eggs and vanilla. 

 One thing you will notice after you beat the wet ingredients together, is that the batter will almost look separated and not as well incorporated as a normal cookie dough.  Don't worry...it will mix well once you add the dry ingredients.


Next add the dry ingredients.  Stir in your dry ingredients using a wooden spoon or spatula.  Notice that the dough looks like it might need more moisture to fully pull together; but no.  After you have incorporated all of the dry ingredients, use your hands to do the final mixing and it will come together in a great, smooth dough.  Wrap the dough in plastic wrap and put into the refrigerator for a couple of hours to chill.

After the dough is chilled, flour your surface and roll out dough to about 1/8 inch thick.  You can make them a little thicker if that is more to your liking.  You may want to work with about half the dough at a time, as this makes quite a few cookies.  Use your favorite cookie cutter shapes, depending on your holiday or occasion.  You can continue to take the trimmings from your shapes and re-roll your dough to use it all.  Put shapes onto a sprayed cookie sheet.  Bake at 325 F. for 8 minutes.  Allow to sit on the pan for a few additional minutes before removing to a rack to cool completely.

Your cookies need to be completely cooled before you decorate them.  The best thing I have found to decorate with and keep your cookies sugar free is Pillsbury Sugar-Free Vanilla Frosting.  This frosting lends itself well to food coloring and you can certainly then put your different colors into small zip bags and snip off the corners to use as piping bags.  You can always add a couple of drops of milk to the frosting if you feel like it is a little thicker that what you like or what you are used to using.  Use a small amount of icing and milk to thin it down if you would rather have a glaze for your cookies.  Just be sure to add the milk a little at a time and stir until you get the consistency that you are happy with.
Note:  At this point, you can add sprinkles in one of the many varieties that exist; but just remember that the sprinkles will add a small amount of sugar to your cookies.


Snickerdoodle Apple Pie

Over the last couple of years, as I have become just as entrenched in the Facebook world as many of you, I have seen so many recipes that are posted by friends and family.  Some are intriguing enough to jot down, and this was one of them; a pie made with cookie dough...yum!  It's been a while since I wrote this one down and of course didn't make a note of the source.  A quick Google and I found it on Food TV's website.
So my first thought was, "Can I make this sugar-free?"  Turns out that I can.  Technically, I guess this would be classified as a No Sugar Added  recipe.  Any time you have fruit in a recipe, it will have some natural sugars in it.  But this recipe has no refined sugar.

So the original recipe I jotted down called for a tube of prepared sugar cookie dough.  A year or two ago, I found a recipe for sugar-free sugar cookies.  Sounds ironic, but I have made it for all occasions:  Valentine's cookies, Halloween cookies, and definitely for Christmas cookies.  I have made these cookies for students in my classes and they have loved them.  Teenagers seem to be some of the most honest people on the planet.  I have mailed these cookies in care packages to my daughter in college, and her friends have a hard time believing her when she says that her mom made "sugar-free sugar cookies".  You might think it an impossibility...but it works.

So first we have to make the cookie dough.

  • 1 c. (2 sticks) I Can't Believe It's Not Butter
  • 3 c. Splenda
  • 2 eggs
  • 4 t. vanilla
  • 3 c. flour
  • 1 t. baking powder
  • 1/2 t. salt
Start by beating the butter in a large mixing bowl.  Add the Splenda a little at a time and beat well.  Once you have incorporated the Splenda into the butter, add the eggs and vanilla. 

 One thing you will notice after you beat the wet ingredients together, is that the batter will almost look separated and not as well incorporated as a normal cookie dough.  Don't worry...it will mix well once you add the dry ingredients.


Next add the dry ingredients.  Stir in your dry ingredients using a wooden spoon or spatula.  Notice that the dough looks like it might need more moisture to fully pull together; but no.  After you have incorporated all of the dry ingredients, use your hands to do the final mixing and it will come together in a great, smooth dough.  Wrap the dough in plastic wrap and put into the refrigerator for a couple of hours to chill.  If you want to make sugar cookies, see the recipe and how to bake them off Sugar Cookie Recipe.


So now we can make the pie:

  • a recipe of sugar-free, sugar cookie dough
  • a 20 ounce can of sugar-free apple pie filling
  • 1/4 c. Splenda
  • 4 t. cinnamon
Use 2/3 of the cookie dough and press into the bottom of a pie plate and up the sides, forming the "pie crust".  Mix together the Splenda and the cinnamon in a small bowl.  Sprinkle 2/3 of the mixture over the cookie dough crust.  Spoon the pie filling evenly over the crust. 

Use the remaining cookie dough and flatten out small pieces to place over the filling.  It should look rustic and it will not completely cover the entire pie.  Sprinkle with the remaining Splenda/cinnamon mixture.  Bake at 335 F. for 35-40 minutes until dough is done.


 This is an amazing pie and the cookie dough makes a soft and chewy crust.  About the only thing I can think of that would make it better, would be a big scoop of sugar-free vanilla ice cream.  But as you can see, it didn't deter anyone in my house from fully enjoying it.  Maybe I can sneak the last piece before anyone notices.


Friday, September 13, 2013

Oatmeal Raisin Cookies

Oh, the comfort I find in the smell of fresh baked cookies.  You know, I think we all kind of revert back to our childhood and when our moms or grandmas baked us cookies.  It just smelled like home.  One of the first recipes I tried to make with Splenda, was this Oatmeal Cookie Recipe.  I have had this recipe for as long as I can remember.  I know it was the one that my mom had and when I asked her where she got it, she said that she figured it came from the oatmeal box.  So I did a little investigation and looked on my oatmeal box, knowing that you almost always use the same brands of products that your mom did...why?...because your mom did...but the recipe wasn't the same.  So either they have changed the recipe on the oatmeal box, or my mom just doesn't remember where the recipe came from.  She is probably going to read this so I should say that I am sure they changed the recipe on the oatmeal box.

So, this is a Low Sugar recipe.  You just can't really make cookies without using brown sugar and as of right now, there is only a blend product for brown sugar.  The great news is that you should only use 1/2 of what the recipe calls for which means it takes the true sugar amount down to 1/4 of what the recipe calls for.  Now I just can't really want any oatmeal cookies that don't have raisins in them, and while raisins don't have any refined sugar, there are natural sugars in all fruit.  I personally don't have any issues with natural sugars; it is the refined sugar that I have worry about.  But if you need to stay away from all types of sugar, you may just want to leave the raisins out.


Ingredient list:
  • 3/4 c. shortening
  • 1/2 c. Splenda Blend brown sugar
  • 1/2 c. Splenda granulated
  • 1 egg
  • 1/4 c. water
  • 1 t. vanilla
  • 3 c. uncooked oats
  • 1 c. flour
  • 1 t. salt
  • 1/2 t. baking soda
  • 1 t. baking powder
  • 1/2-1 c. raisins (to your liking)


Start by preheating your oven to 335 F.  Mix all of your wet ingredients in a large mixing bowl, using an electric mixer:  Shortening, sugar substitutes, egg, water and vanilla.

Of course, you can always go old school and mix it together with a large wooden spoon.  Maybe you can skip your workout for the day!
 Stir in your dry ingredients:  oatmeal, flour, salt, baking soda and baking powder.  Please note that by stirring in the dry ingredients just until incorporated, your cookies will be softer and more tender.  I use a big spoon-shaped spatula.

Finally, mix in your raisins.  You can add other optional ingredients as well.  You might try nuts, sugar-free chocolate chips, etc.  Use your imagination, depending on your own tastes.
 Spray a cookie sheet with cooking spray.  As you prepare the dough to put on the pan, take a look at my tip about forming your cookies, since Splenda based cookies will not spread while cooking.


Eleven (11) has always been my go to number when baking cookies.  I have mentioned before that I really enjoy soft, chewy cookies.  By only baking them for 11 minutes, they will come out of the oven still a little soft and not really completely cooked.  But here is the trick.  Leave them on the hot pan for 3-5 minutes more before moving them to a cooling rack.  They will finish cooking and you will have the most chewy cookies.