Fourth of July in Arkansas means sweet corn, watermelon, and blackberries. We have great fruit farms here in NW Arkansas and I have been to the blueberry farm this summer. However, we have blackberries growing wild here and so I have a hard time paying $3 or $4 a pint for something I can get for free. A couple of months ago I started keeping my eye out for blooming blackberry bushes as I ran and biked around the trails in our area. This last week I went for my first picking. I am not going to say exactly where because I plan to go back for more. And because I already have someone scoping the same bushes as they didn't have as many as I was expecting and the grass around was trampled down. I am hoping that person got as many as they wanted so that I can get enough to put in the freezer. I only got enough this time for one pie, but it was a good pie. Also, I can't really complain, because they were free!
Wild blackberries are much smaller and quite a bit more tart than cultivated ones. No worries... just a little more Splenda will do the trick. This recipe is a No Sugar Added recipe as the blackberries do have natural sugars.
This recipe is for a small pie/cobbler. Now we have had the discussion before about the difference between pie and cobbler. If you want to revisit that discussion you can read it here.
4 cups blackberries
1 cup Splenda
1/2 cup flour
1 teaspoon cinnamon (optional)
1/2 teaspoon nutmeg (optional)
Cinnamon and nutmeg may seem a strange addition to blackberries, but I add them to any of my fruit pies and cobbler. If it is not your favorite, you can certainly leave it out.
Since I was only making a small pie, I only made a single recipe of pie crust. I used about 2/3 on the bottom and 1/3 on the top.
1 1/4 cups of flour
1/4 teaspoon of salt
1/3 cup of vegetable shortening
3-4 tablespoons water
Add the flour and salt to a bowl. Cut in the shortening with a pastry cutter or a fork. Add water and stir with a fork to incorporate flour into dough. You may need to work it with your hands at the end.
Use about 2/3 of dough for the bottom crust. Put a little flour on your counter or board. Roll the dough out fairly thin. Think about the shape of your dish to determine the shape of your dough. Since I was going the cobbler route, I left the edges rustic not worrying about finished edges.
After lining your dish with the dough add in the fruit mixture. Add in three or four pats of butter. Roll out the last part of the dough to top your cobbler. No need for it to reach the edges. You really want some of the fruit peaking out. Don't forget to cut a few slits in the top crust to allow the steam to escape. I also usually sprinkle the top with just a little more Splenda to make the top sparkle.
Bake at 350 degrees for 30-40 minutes. Just watch for the crust to begin to turn golden brown. I don't know about you bit I want to eat my cobbler warm...
... and a little ice cream can only make it better. To keep your sugar down, don't forget to use a no sugar added variety or a low-fat or no sugar frozen yogurt.
Well, that didn't last long, so I will be off in a couple of days to check the bushes again... just hope I beat that other person this time.
Sugar-free recipes that allow you to indulge in decadent desserts without the guilt
Showing posts with label pie. Show all posts
Monday, July 7, 2014
Sunday, March 23, 2014
Cocoa Cream Pie
My mom makes a great cream pie. I remember eating warm coconut cream pie as a kid... amazing! My husband is always talking about the cream pies that his grandma Rebecca used to make. I wish I would have been able to try them. I guess that cream pies are just something that I have never tackled for fear that they wouldn't come out. I have always just taken the instant pudding mix way out and made non-cook pies that way, and they are good... just not amazing.
As with so many of my new recipes, this one came across my Facebook Feed, from someone named Andrea Green in Love Yourself Healthy: Granny's Cocoa Cream Pie So I thought I would give it a try. It came out pretty good if I do say so myself, although I am not sure I will put it in the amazing category yet... maybe I need to "practice" a few more times. I'm sure that my husband would not complain, he mostly enjoys being the guinea pig.
I know that we have discussed pie crusts before. And I love to make my own pie crust, it really isn't that hard. But there is nothing wrong with using a refrigerator, roll-out pie crust from time to time to speed things up a little. Even when using a prepared crust, you can take just a couple of minutes and fancy it up a bit by fluting the edges. Fold under the edge so that the pie crust is a little thicker along the edge. Just press your thumb between your thumb and forefinger of the other hand. Work your way around the entire pie and ... voila!
Prick the bottom of the pie crust with a fork to allow the steam to escape and bake according to the package directions, or according to your pie crust recipe. Set the cooked pie shell on a cooling rack while you prepare the cream filling.
Separate eggs. Save the whites if you would like to make a meringue for the top of your pie, or if you would like an egg white omelette for breakfast tomorrow.
Beat egg yolks and add to a heavy-bottomed saucepan along with Splenda. I decided that it was most helpful to mix these with a whisk.
Add the cornstarch, cocoa and salt, then whisk together. Begin to heat over medium-high heat.
While stirring, gradually add milk. Continue to stir constantly, cooking until thick, beating it smooth. The recipe said that this might take from 10-15 minutes. It didn't take that long, and it thickened rapidly, so don't walk away! Don't quit stirring!
As soon as it thickens, remove from heat and pour into the pie shell.
Put in the fridge to chill. One of things that I remember from my mom, making cooked puddings, etc., was that she was always trying to prevent a "skin" from forming. So I used some plastic wrap and gently pressed it on the top of the filling before I set it in the fridge. It will take an hour or so for the pie to chill. Then just gently pull the plastic off.
You can serve this with whipped cream, either homemade or store bought or as previously mentioned, you can make a meringue from your egg whites and top the pie.
I think this is a great easy recipe and my husband didn't even know it was one of my Sugar Free recipes!
As with so many of my new recipes, this one came across my Facebook Feed, from someone named Andrea Green in Love Yourself Healthy: Granny's Cocoa Cream Pie So I thought I would give it a try. It came out pretty good if I do say so myself, although I am not sure I will put it in the amazing category yet... maybe I need to "practice" a few more times. I'm sure that my husband would not complain, he mostly enjoys being the guinea pig.
- 1 refrigerator, prepared pie crust or 1 recipe for a 9" pie crust
- 1/2 c. cocoa powder
- 1/4 c. cornstarch
- 3 egg yolks
- 1 1/2 c. Splenda granulated
- 1/4 t. salt
- 2 c. milk (2%)
- 1 t. vanilla
I know that we have discussed pie crusts before. And I love to make my own pie crust, it really isn't that hard. But there is nothing wrong with using a refrigerator, roll-out pie crust from time to time to speed things up a little. Even when using a prepared crust, you can take just a couple of minutes and fancy it up a bit by fluting the edges. Fold under the edge so that the pie crust is a little thicker along the edge. Just press your thumb between your thumb and forefinger of the other hand. Work your way around the entire pie and ... voila!
Prick the bottom of the pie crust with a fork to allow the steam to escape and bake according to the package directions, or according to your pie crust recipe. Set the cooked pie shell on a cooling rack while you prepare the cream filling.
Separate eggs. Save the whites if you would like to make a meringue for the top of your pie, or if you would like an egg white omelette for breakfast tomorrow.
Beat egg yolks and add to a heavy-bottomed saucepan along with Splenda. I decided that it was most helpful to mix these with a whisk.
Add the cornstarch, cocoa and salt, then whisk together. Begin to heat over medium-high heat.
While stirring, gradually add milk. Continue to stir constantly, cooking until thick, beating it smooth. The recipe said that this might take from 10-15 minutes. It didn't take that long, and it thickened rapidly, so don't walk away! Don't quit stirring!
As soon as it thickens, remove from heat and pour into the pie shell.
Put in the fridge to chill. One of things that I remember from my mom, making cooked puddings, etc., was that she was always trying to prevent a "skin" from forming. So I used some plastic wrap and gently pressed it on the top of the filling before I set it in the fridge. It will take an hour or so for the pie to chill. Then just gently pull the plastic off.
You can serve this with whipped cream, either homemade or store bought or as previously mentioned, you can make a meringue from your egg whites and top the pie.
I think this is a great easy recipe and my husband didn't even know it was one of my Sugar Free recipes!
Friday, March 14, 2014
Apple Dumplings
Are you just hankering for something sweet after dinner, but you didn't plan for anything? The other night, my husband and I were thinking just that. I found that I had a couple of apples in my fridge and a prepared pie crust left over as I had made a quiche a couple of days before and only used one in the package. You can throw this in the oven quickly and it will make your house smell wonderful!
I used about 1/3 of the pie crust for each apple. It doesn't have to fit around the apple perfectly, but put the crust down in the bottom of the dish. Add 2 or 3 T. of butter into the core of each apple and then a couple of spoonfuls of the brown sugar blend. This makes the recipe a Low Sugar recipe. If desired, give a sprinkle of cinnamon and/or nutmeg.
Wrap the pie crust around the apples. No worries if it doesn't wrap up nice and neat... trim and patch.
Bake the apples at 350 degrees for 45 to 1 hour. Just check it occasionally. You want the crust to become a beautiful golden brown.
You can serve these apples with a little half-n-half or a small scoop of no sugar added ice cream or frozen yoghurt. The apple inside is going to be warm, sweet and soft.
Sorry there isn't a picture of the finished apples. They smelled so good, that we dove in and ate them right away and I forgot to take the picture... the smell went straight to my brain!
- 1 apple per person
- I Can't Believe It's Not Butter
- Splenda brown sugar Blend
- cinnamon and/or nutmeg
- prepared pie crust
I used about 1/3 of the pie crust for each apple. It doesn't have to fit around the apple perfectly, but put the crust down in the bottom of the dish. Add 2 or 3 T. of butter into the core of each apple and then a couple of spoonfuls of the brown sugar blend. This makes the recipe a Low Sugar recipe. If desired, give a sprinkle of cinnamon and/or nutmeg.
Wrap the pie crust around the apples. No worries if it doesn't wrap up nice and neat... trim and patch.
Bake the apples at 350 degrees for 45 to 1 hour. Just check it occasionally. You want the crust to become a beautiful golden brown.
You can serve these apples with a little half-n-half or a small scoop of no sugar added ice cream or frozen yoghurt. The apple inside is going to be warm, sweet and soft.
Sorry there isn't a picture of the finished apples. They smelled so good, that we dove in and ate them right away and I forgot to take the picture... the smell went straight to my brain!
Tuesday, February 25, 2014
Chocolate Banana Pineapple Pie
One of my friends is from Hawai'i and shared this recipe with me from cookinghawaiianstyle.com I love tropical flavors and so I have been waiting for the time when I could make this pie. The combination of bananas and chocolate and pineapple... Mmmmmm!!!
The first thing you can say about this pie is that it is ... beautiful!! It is considered a Low Sugar dessert since I have yet to find any sugar free graham crackers and there is a small amount of brown sugar Blend in the crust. So here's what you do...
Mix first 3 ingredients for crust and press into the bottom of a pie plate. Bake at 325 degrees for 6-8 minutes to set.
Now you can probably tell from my picture that I decided to use an already prepared graham cracker crust. I just happened to have a reduced-fat crust in my pantry and decided to use it. While it tasted fine, when I make this pie again, I will make my own crust, simply because the pre-made crust was not large enough and it did not hold the entire filling. As a matter of fact, it didn't even hold half. What I may try is doing a one and half times the recipe for the crust and make this in a 9x9 pan, so that it is deep enough to hold the entire filling.
Next, pour the chocolate syrup and spread over the entire crust. I took a second before measuring the syrup and sprayed my measuring cup with a little cooking spray, so that the syrup came out easily.
Slice your bananas. Make sure that they are not too thick or too thin. Layer them all over your chocolate syrup.
Whip together cream cheese & pudding mix and then slowly add milk. I felt like this mixture didn't quite smooth out. Tastes wonderful, but the cream cheese didn't seem to fully mix in. Next time, I will mix the pudding mixture with the milk in a separate bowl and allow it to start thickening. Then after whipping the cream cheese to lighten it a bit, slowly add in the pudding. I believe this will allow for a smoother filling.
Pour filling over the banana layer.
Drain pineapple. This is an extremely important step. If you have some kind of strainer, I might open the pineapple before you begin the rest of the pie and let it set over a bowl and drain until you are ready for it. Don't throw that pineapple juice away!!! It mixes in to make a great smoothie!
Sprinkle the pieces of crushed pineapple over the top of your filling.
At this point, I allowed the pie to set up just a bit in the fridge; 30-45 minutes.
Finally, top your pie with with the Cool Whip and drizzle with some additional chocolate syrup.

Allow the pie to firm up just a little longer in the fridge. Serve and enjoy.....
Thanks Jennie W!!!! Can't wait to try this with some fresh Hawai'ian pineapple!
The first thing you can say about this pie is that it is ... beautiful!! It is considered a Low Sugar dessert since I have yet to find any sugar free graham crackers and there is a small amount of brown sugar Blend in the crust. So here's what you do...
- 1 c. graham cracker crumbs
- 1/6 c. Splenda brown sugar blend
- 1/4 c. I Can't Believe It's Not Butter, melted
- 1 c. sugar-free chocolate syrup
- 2 medium to large bananas, firm
- 8 oz. reduced fat cream cheese
- 2 pkg. sugar free vanilla pudding
- 3 c. 2% milk
- 12 oz. crushed pineapple, drained
- 8 oz. sugar free Cool Whip
Mix first 3 ingredients for crust and press into the bottom of a pie plate. Bake at 325 degrees for 6-8 minutes to set.
Now you can probably tell from my picture that I decided to use an already prepared graham cracker crust. I just happened to have a reduced-fat crust in my pantry and decided to use it. While it tasted fine, when I make this pie again, I will make my own crust, simply because the pre-made crust was not large enough and it did not hold the entire filling. As a matter of fact, it didn't even hold half. What I may try is doing a one and half times the recipe for the crust and make this in a 9x9 pan, so that it is deep enough to hold the entire filling.
Next, pour the chocolate syrup and spread over the entire crust. I took a second before measuring the syrup and sprayed my measuring cup with a little cooking spray, so that the syrup came out easily.
Slice your bananas. Make sure that they are not too thick or too thin. Layer them all over your chocolate syrup.
Whip together cream cheese & pudding mix and then slowly add milk. I felt like this mixture didn't quite smooth out. Tastes wonderful, but the cream cheese didn't seem to fully mix in. Next time, I will mix the pudding mixture with the milk in a separate bowl and allow it to start thickening. Then after whipping the cream cheese to lighten it a bit, slowly add in the pudding. I believe this will allow for a smoother filling.
Pour filling over the banana layer.
Drain pineapple. This is an extremely important step. If you have some kind of strainer, I might open the pineapple before you begin the rest of the pie and let it set over a bowl and drain until you are ready for it. Don't throw that pineapple juice away!!! It mixes in to make a great smoothie!
Sprinkle the pieces of crushed pineapple over the top of your filling.
At this point, I allowed the pie to set up just a bit in the fridge; 30-45 minutes.
Finally, top your pie with with the Cool Whip and drizzle with some additional chocolate syrup.
Allow the pie to firm up just a little longer in the fridge. Serve and enjoy.....
Thanks Jennie W!!!! Can't wait to try this with some fresh Hawai'ian pineapple!
Thursday, January 2, 2014
Crustless Hot Fudge Pie
I had some friends over for lunch the other day and was looking for a new and easy dessert. I looked through some recipes that I had seen and written down; I settled on this one. It had come across in a shared format on my FB feed. I found it at the following link. It took no time at all to mix up and we were able to eat it warm.
It doesn't look like much batter, but is enough for this small pie. It will make 6 regular size dessert pieces. Spray an 8" pie plate and pour in the mixture.
Heat oven to 335 degrees and bake for 30-35 minutes. Allow to cool for just a few minutes. You will want to eat it warm.
I just happened to have some sugar-free ice cream in the freezer... It was the perfect addition to make it very delicious!
- 1 stick I Can't Believe It's Not Butter, softened
- 1 c. Splenda
- 2 eggs
- 1 t. vanilla
- 3 T. cocoa powder
- 1/2 t. salt
- 1/2 c. flour
It doesn't look like much batter, but is enough for this small pie. It will make 6 regular size dessert pieces. Spray an 8" pie plate and pour in the mixture.
Heat oven to 335 degrees and bake for 30-35 minutes. Allow to cool for just a few minutes. You will want to eat it warm.
I just happened to have some sugar-free ice cream in the freezer... It was the perfect addition to make it very delicious!
Friday, December 27, 2013
Peach Crisp
I have been doing so much baking in the last couple of weeks that I haven't had the time to get anything posted. So you can expect quite a few new recipes coming in the next few days.
Recently I posted a recipe for peach cobbler. Not long ago we had a potluck at my work for the holidays and my department was set to bring desserts. The afternoon before, as I was struggling to make a decision on what to make, I was watching the Barefoot Contessa on Food Network. She was making one of her famous crisps. So I quickly wrote down her crisp topping recipe and took another package of peaches out of the freezer. I was able to mix this up in no time and baked it that evening. It was perfect for a potluck! This is a Low Sugar recipe; there is some brown sugar in the recipe and the natural sugars in the fruit.
First, take a look at my peach cobbler recipe for the filling. Remember that peach just happens to be one of my family's favorites. You can always use any fruit or fruit combination that happens to be in season or that you might have in your freezer. You won't have any crust, so spray your pie plate or dish and pour in your fruit filling. I looked for the link to Ina Garten's crisp topping, but can't find one that doesn't have oatmeal. Interesting because I wrote it down while I was watching and it came out great. So I can't find the link, but here is what I wrote down with my little twists.
Cover the top of your fruit completely with the topping mixture. Mine was more than a thin layer by the time I got it all on.
Bake at 350 degrees for 40-45 minutes. This was a quick and easy preparation and perfect for the potluck. No need to cut into pieces...just add a serving spoon and you are set to go!
Recently I posted a recipe for peach cobbler. Not long ago we had a potluck at my work for the holidays and my department was set to bring desserts. The afternoon before, as I was struggling to make a decision on what to make, I was watching the Barefoot Contessa on Food Network. She was making one of her famous crisps. So I quickly wrote down her crisp topping recipe and took another package of peaches out of the freezer. I was able to mix this up in no time and baked it that evening. It was perfect for a potluck! This is a Low Sugar recipe; there is some brown sugar in the recipe and the natural sugars in the fruit.
First, take a look at my peach cobbler recipe for the filling. Remember that peach just happens to be one of my family's favorites. You can always use any fruit or fruit combination that happens to be in season or that you might have in your freezer. You won't have any crust, so spray your pie plate or dish and pour in your fruit filling. I looked for the link to Ina Garten's crisp topping, but can't find one that doesn't have oatmeal. Interesting because I wrote it down while I was watching and it came out great. So I can't find the link, but here is what I wrote down with my little twists.
- 1 c. flour
- 1/3 c. Splenda
- 1/4 c. Splenda Blend brown sugar
- 1/2 t. salt
- 1 t. cinnamon
- 1 stick I Can't Believe It's Not Butter
Cover the top of your fruit completely with the topping mixture. Mine was more than a thin layer by the time I got it all on.
Bake at 350 degrees for 40-45 minutes. This was a quick and easy preparation and perfect for the potluck. No need to cut into pieces...just add a serving spoon and you are set to go!
Monday, December 16, 2013
Peach Cobbler
I have to admit that one of the main reasons why I go to the trouble of freezing peaches in the summer is so that I can enjoy wonderful, warm peach cobbler in the winter. So I know that technically it isn't winter yet, but it has been cold here and this weekend just felt like I needed a decadent dessert.
Now we could have a debate here about exactly what cobbler is... I know that are several definitions, but I'll just be real honest here: I am from Oklahoma and a cobbler is basically a pie in a square or rectangular dish. End of my discussion... ya'll can discuss further if you want to.
First you start with a pie crust, you will need one for the bottom and one for the top. This will make enough for an 8 x 8 dish. If you want to double this recipe as far as the fruit is concerned and make one in a 9 x 13 pan, you can make 3 pie crusts and use 1 1/2 for the bottom and 1 1/2 for the top.
For one crust:
*1 1/4 c. flour
*3 T. Shortening
*1/2 t. salt
*3-4 T. cold water
Use a pastry blender or a fork and work the shortening into the flour and salt. Add 3 T. water and mix together with a fork, incorporating all of the flour. If needed, add the additional T. of water. Empty out onto your counter or board dusted with a little flour. Roll out just as you would for a pie, but don't worry too much about the shape. A cobbler is supposed to be rustic, and remember this is going into a square dish.
For this size you are going to use:
4 c. fruit (thawed and drained, if you are using frozen)
3/4 c. Splenda
1/3 c. flour
1 t. cinnamon
1 t. nutmeg
Now I will be the first to admit that I used to be a purist and if I was making a peach cobbler, it was going to be peach... period. But lately I guess my taste buds have gotten more sophisticated, or maybe just more open-minded. I still had some blueberries in my freezer from this summer, so I decided to add a few to my peaches. Mix together to coat the fruit.
Pour the fruit into the cobbler dish. Dab a few dots of I Can't Believe It's Not Butter on the top of the fruit. Roll out your other crust. Again, don't worry too much about the shape, but you may want to trim it so that it doesn't hang over the edge too much. You don't want to have super thick crust along the edges.
Cut some slits into the top of your crust to let the steam escape and sprinkle with a little Splenda just to make it sparkle.
Bake at 350 degrees for 35-40 minutes. You will just want to make sure that the crust begins to turn golden and becomes flaky. If you decide to make a bigger one, it will probably take a little closer to an hour.
Now I don't know about you, but there is not much better than a warm cobbler, served with some vanilla ice cream! If you haven't tried Blue Bunny's No Sugar Added ice cream, you should give it a try.
One of the things I remember from my childhood, is that when my mom made pie or cobbler, we got cinnamon crisps!
So when you trim off your top crust, give these a try just for a little snack.
Spray a cookie sheet and place your pieces of extra dough on the sheet. Using a knife, spread a little I Can't Believe It's Not Butter on each piece. Mix a quarter cup of Splenda with a teaspoon of cinnamon in a small bowl and sprinkle the tops with the mixture. Bake in the oven at 350 degrees for 10-15 minutes. Careful... they are hot when they come out of the oven!
Now we could have a debate here about exactly what cobbler is... I know that are several definitions, but I'll just be real honest here: I am from Oklahoma and a cobbler is basically a pie in a square or rectangular dish. End of my discussion... ya'll can discuss further if you want to.
First you start with a pie crust, you will need one for the bottom and one for the top. This will make enough for an 8 x 8 dish. If you want to double this recipe as far as the fruit is concerned and make one in a 9 x 13 pan, you can make 3 pie crusts and use 1 1/2 for the bottom and 1 1/2 for the top.
For one crust:
*1 1/4 c. flour
*3 T. Shortening
*1/2 t. salt
*3-4 T. cold water
Use a pastry blender or a fork and work the shortening into the flour and salt. Add 3 T. water and mix together with a fork, incorporating all of the flour. If needed, add the additional T. of water. Empty out onto your counter or board dusted with a little flour. Roll out just as you would for a pie, but don't worry too much about the shape. A cobbler is supposed to be rustic, and remember this is going into a square dish.
4 c. fruit (thawed and drained, if you are using frozen)
3/4 c. Splenda
1/3 c. flour
1 t. cinnamon
1 t. nutmeg
Now I will be the first to admit that I used to be a purist and if I was making a peach cobbler, it was going to be peach... period. But lately I guess my taste buds have gotten more sophisticated, or maybe just more open-minded. I still had some blueberries in my freezer from this summer, so I decided to add a few to my peaches. Mix together to coat the fruit.
Pour the fruit into the cobbler dish. Dab a few dots of I Can't Believe It's Not Butter on the top of the fruit. Roll out your other crust. Again, don't worry too much about the shape, but you may want to trim it so that it doesn't hang over the edge too much. You don't want to have super thick crust along the edges.
Cut some slits into the top of your crust to let the steam escape and sprinkle with a little Splenda just to make it sparkle.
Bake at 350 degrees for 35-40 minutes. You will just want to make sure that the crust begins to turn golden and becomes flaky. If you decide to make a bigger one, it will probably take a little closer to an hour.
Now I don't know about you, but there is not much better than a warm cobbler, served with some vanilla ice cream! If you haven't tried Blue Bunny's No Sugar Added ice cream, you should give it a try.
One of the things I remember from my childhood, is that when my mom made pie or cobbler, we got cinnamon crisps!
So when you trim off your top crust, give these a try just for a little snack.
Spray a cookie sheet and place your pieces of extra dough on the sheet. Using a knife, spread a little I Can't Believe It's Not Butter on each piece. Mix a quarter cup of Splenda with a teaspoon of cinnamon in a small bowl and sprinkle the tops with the mixture. Bake in the oven at 350 degrees for 10-15 minutes. Careful... they are hot when they come out of the oven!
Tuesday, November 12, 2013
Pumpkin Pie
It's time for more pumpkin!! Mmmmmm...pumpkin pie. You know that you are going to want pumpkin pie for Thanksgiving dinner...believe me... this is going to be good. I am even going to go as far as to say that you can make this pie, and not tell anyone it is No Sugar Added, and no one will even know. This is not a secret or special recipe. It is the one that you get off of the pumpkin can. A simple Splenda substitution is all you need.
For the crust:
*1 1/4 c. flour
*1/4 t. salt
*1/3 c. shortening
*3-4 T. water
For the pie filling:
*3/4 c. Splenda
*1/2 t. salt
*1 t. cinnamon
*1/2 t. ginger
*1/4 t. ground cloves
*2 large eggs
*1 15oz. can of pumpkin
*1 12oz. can of evaporated milk
You are more than welcome to use a prepared pie crust. I do it quite often but just didn't happen to have one this weekend. Pie crust is an interesting thing in my family. My mom always used the same recipe for pie crust, and so of course that is the recipe that I always used. One year at Thanksgiving, we were getting ready to make the pies and either my mom or my sister asked me why I was getting out the vinegar (one of the ingredients in our "family" pie crust recipe). So I said that I was getting ready to make pie crust. They took that moment to tell me that "We don't use that recipe anymore. Here is the one we use now." So I asked them how long they had been using this "new family pie crust recipe". "Oh, I don't know. For a while now." I cannot tell you how upset I was that no one bothered to inform me that we had a "new family pie crust recipe". So, in protest, I neither use the "old" nor the "new" recipe. I have found my own.
First you mix the flour and the salt in a medium-size mixing bowl. Add the shortening and cut it in with a pastry cutter. If you don't have one, you could use a fork. Next you add the water, but only 1 tablespoon at a time. After each addition of water, mix it around with a fork and start to incorporate the water and flour. Unless it is just an extremely humid day, you will probably use the entire 4 tablespoons of water, but still only add it one tablespoon at a time, just to be sure. You certainly don't want to have too much. Once the flour is incorporated, use your hands to bring it together and form it into a ball.
Turn your dough out onto a floured surface and after flouring your dough, your hands and your rolling pin, roll the crust out into a large circle. Roll the dough up onto your rolling pin and transfer to your pie plate. Trim off any large amount of hangover, but leave about an inch extra to turn under. Use the thumb of your right hand and the thumb and forefinger of your left hand to crimp the edges of the crust around the pie. I love that part, because it makes the pie look so pretty!
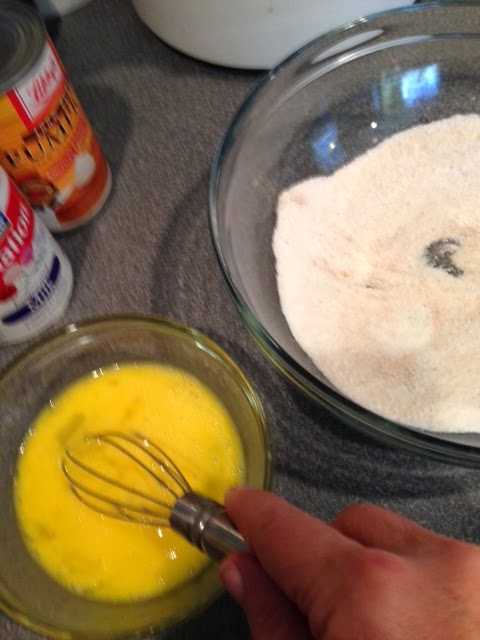
Now that your crust is ready, you can mix up the filling. In a mixing bowl, measure out all of your dry ingredients. Beat your eggs in a small bowl and then add to your mixing bowl and incorporate them. Next, add in the can of pumpkin and mix well. The last step is to slowly pour in the can of evaporated milk while incorporating using a whisk. This is going to give you that pretty light orange color.
Slowly pour the filling into your prepared pie crust. I think it is important to use a deep dish pie plate for this as it makes quite a bit of filling. I think that if you have a shallow one, it might over flow, or you will have filling left over.
Bake this pie in two segments. First bake it at 425 degrees for 15 minutes. Then turn the temperature down to 340 degrees and bake it for an additional 50 minutes. I put a pie shield on my crust for the last 15 minutes to keep the crust from burning.
Once you take the pie out of the oven, put it on a cooling rack for a couple of hours. Serve and enjoy!
If you have any leftovers, store in the refrigerator.
I hope you all will give this a try...see how many people you can fool! Happy Thanksgiving!
For the crust:
*1 1/4 c. flour
*1/4 t. salt
*1/3 c. shortening
*3-4 T. water
For the pie filling:
*3/4 c. Splenda
*1/2 t. salt
*1 t. cinnamon
*1/2 t. ginger
*1/4 t. ground cloves
*2 large eggs
*1 15oz. can of pumpkin
*1 12oz. can of evaporated milk
You are more than welcome to use a prepared pie crust. I do it quite often but just didn't happen to have one this weekend. Pie crust is an interesting thing in my family. My mom always used the same recipe for pie crust, and so of course that is the recipe that I always used. One year at Thanksgiving, we were getting ready to make the pies and either my mom or my sister asked me why I was getting out the vinegar (one of the ingredients in our "family" pie crust recipe). So I said that I was getting ready to make pie crust. They took that moment to tell me that "We don't use that recipe anymore. Here is the one we use now." So I asked them how long they had been using this "new family pie crust recipe". "Oh, I don't know. For a while now." I cannot tell you how upset I was that no one bothered to inform me that we had a "new family pie crust recipe". So, in protest, I neither use the "old" nor the "new" recipe. I have found my own.
Turn your dough out onto a floured surface and after flouring your dough, your hands and your rolling pin, roll the crust out into a large circle. Roll the dough up onto your rolling pin and transfer to your pie plate. Trim off any large amount of hangover, but leave about an inch extra to turn under. Use the thumb of your right hand and the thumb and forefinger of your left hand to crimp the edges of the crust around the pie. I love that part, because it makes the pie look so pretty!
Now that your crust is ready, you can mix up the filling. In a mixing bowl, measure out all of your dry ingredients. Beat your eggs in a small bowl and then add to your mixing bowl and incorporate them. Next, add in the can of pumpkin and mix well. The last step is to slowly pour in the can of evaporated milk while incorporating using a whisk. This is going to give you that pretty light orange color.
Slowly pour the filling into your prepared pie crust. I think it is important to use a deep dish pie plate for this as it makes quite a bit of filling. I think that if you have a shallow one, it might over flow, or you will have filling left over.
Bake this pie in two segments. First bake it at 425 degrees for 15 minutes. Then turn the temperature down to 340 degrees and bake it for an additional 50 minutes. I put a pie shield on my crust for the last 15 minutes to keep the crust from burning.
Once you take the pie out of the oven, put it on a cooling rack for a couple of hours. Serve and enjoy!
If you have any leftovers, store in the refrigerator.
I hope you all will give this a try...see how many people you can fool! Happy Thanksgiving!
Sunday, September 15, 2013
Snickerdoodle Apple Pie
Over the last couple of years, as I have become just as entrenched in the Facebook world as many of you, I have seen so many recipes that are posted by friends and family. Some are intriguing enough to jot down, and this was one of them; a pie made with cookie dough...yum! It's been a while since I wrote this one down and of course didn't make a note of the source. A quick Google and I found it on Food TV's website.
So my first thought was, "Can I make this sugar-free?" Turns out that I can. Technically, I guess this would be classified as a No Sugar Added recipe. Any time you have fruit in a recipe, it will have some natural sugars in it. But this recipe has no refined sugar.
So the original recipe I jotted down called for a tube of prepared sugar cookie dough. A year or two ago, I found a recipe for sugar-free sugar cookies. Sounds ironic, but I have made it for all occasions: Valentine's cookies, Halloween cookies, and definitely for Christmas cookies. I have made these cookies for students in my classes and they have loved them. Teenagers seem to be some of the most honest people on the planet. I have mailed these cookies in care packages to my daughter in college, and her friends have a hard time believing her when she says that her mom made "sugar-free sugar cookies". You might think it an impossibility...but it works.
So first we have to make the cookie dough.
One thing you will notice after you beat the wet ingredients together, is that the batter will almost look separated and not as well incorporated as a normal cookie dough. Don't worry...it will mix well once you add the dry ingredients.

Next add the dry ingredients. Stir in your dry ingredients using a wooden spoon or spatula. Notice that the dough looks like it might need more moisture to fully pull together; but no. After you have incorporated all of the dry ingredients, use your hands to do the final mixing and it will come together in a great, smooth dough. Wrap the dough in plastic wrap and put into the refrigerator for a couple of hours to chill. If you want to make sugar cookies, see the recipe and how to bake them off Sugar Cookie Recipe.

So now we can make the pie:

This is an amazing pie and the cookie dough makes a soft and chewy crust. About the only thing I can think of that would make it better, would be a big scoop of sugar-free vanilla ice cream. But as you can see, it didn't deter anyone in my house from fully enjoying it. Maybe I can sneak the last piece before anyone notices.
So my first thought was, "Can I make this sugar-free?" Turns out that I can. Technically, I guess this would be classified as a No Sugar Added recipe. Any time you have fruit in a recipe, it will have some natural sugars in it. But this recipe has no refined sugar.
So the original recipe I jotted down called for a tube of prepared sugar cookie dough. A year or two ago, I found a recipe for sugar-free sugar cookies. Sounds ironic, but I have made it for all occasions: Valentine's cookies, Halloween cookies, and definitely for Christmas cookies. I have made these cookies for students in my classes and they have loved them. Teenagers seem to be some of the most honest people on the planet. I have mailed these cookies in care packages to my daughter in college, and her friends have a hard time believing her when she says that her mom made "sugar-free sugar cookies". You might think it an impossibility...but it works.
- 1 c. (2 sticks) I Can't Believe It's Not Butter
- 3 c. Splenda
- 2 eggs
- 4 t. vanilla
- 3 c. flour
- 1 t. baking powder
- 1/2 t. salt
Start by beating the butter in a large mixing bowl. Add the Splenda a little at a time and beat well. Once you have incorporated the Splenda into the butter, add the eggs and vanilla.
One thing you will notice after you beat the wet ingredients together, is that the batter will almost look separated and not as well incorporated as a normal cookie dough. Don't worry...it will mix well once you add the dry ingredients.
Next add the dry ingredients. Stir in your dry ingredients using a wooden spoon or spatula. Notice that the dough looks like it might need more moisture to fully pull together; but no. After you have incorporated all of the dry ingredients, use your hands to do the final mixing and it will come together in a great, smooth dough. Wrap the dough in plastic wrap and put into the refrigerator for a couple of hours to chill. If you want to make sugar cookies, see the recipe and how to bake them off Sugar Cookie Recipe.

So now we can make the pie:
- a recipe of sugar-free, sugar cookie dough
- a 20 ounce can of sugar-free apple pie filling
- 1/4 c. Splenda
- 4 t. cinnamon
Use 2/3 of the cookie dough and press into the bottom of a pie plate and up the sides, forming the "pie crust". Mix together the Splenda and the cinnamon in a small bowl. Sprinkle 2/3 of the mixture over the cookie dough crust. Spoon the pie filling evenly over the crust.
Use the remaining cookie dough and flatten out small pieces to place over the filling. It should look rustic and it will not completely cover the entire pie. Sprinkle with the remaining Splenda/cinnamon mixture. Bake at 335 F. for 35-40 minutes until dough is done.

This is an amazing pie and the cookie dough makes a soft and chewy crust. About the only thing I can think of that would make it better, would be a big scoop of sugar-free vanilla ice cream. But as you can see, it didn't deter anyone in my house from fully enjoying it. Maybe I can sneak the last piece before anyone notices.
Labels:
apple,
cookies,
no sugar added,
pie,
snickerdoodle
Subscribe to:
Posts (Atom)
