It all started with a trip to Van Zandt's Orchards. I felt like I had kind of waited late in the season and was afraid I might have missed the opportunity to get apples. But when I got there, they still had plenty. The ones that looked the best to me were the Blushing Wine, which I had never heard of before, but they were definitely pretty.
So when I got home, I knew that I didn't have time to do anything big with them, but I did feel like I needed to make "something" with apples for dessert. After checking my pantry and fridge, I found a can of crescent rolls and decided that I could whip up a quick version of apple turnovers.


 I know that I have mentioned in the past that I have not found a great powdered sugar recipe; and for things that call for large amounts of powdered sugar, that is true. However, if you are just needing a small amount of powdered sugar, here is a recipe that you mix up and keep and in your pantry.
- 1 c. nonfat dry milk
- 1 c. cornstarch
- 2/3 c. Splenda
Lastly, I just mixed up a few tablespoons of powdered sugar substitute with a teaspoon or so of milk and stirred to make a glaze consistency. This is one of those things that is really a trial and error. It doesn't take much liquid to turn powdered sugar into a glaze, so just add a few drops at a time. Add more if you need to. If it gets too runny, just add a little more powdered sugar. Drizzle the glaze over those hot-out-of-the-oven turnovers and...ENJOY this No Sugar Added dessert!!
On Saturday, I put the day aside to make some apple cider and apple butter. Some great sounding recipes had come across my Facebook page and I had decided that I wanted to give some of these a try and see how I could do them using the sugar substitutes.
The recipe for Apple Butter I had decided to try was for a recipe that you make in the crock pot. That sounded appealing because I thought that I would haven't be standing over it all day stirring; and I was correct. This recipe came from skinnytaste.com This recipe below has been adjusted for the Splenda Blend brown sugar. Because of the blend, this is a Low-Sugar recipe:

1 c. Splenda
1/2 c. Splenda Blend, brown sugar
2 t. cinnamon
1/4 t. allspice
1/4 t. nutmeg
First you have to peel and chop the apples. This takes a little while, so I just turned on the TV and watched a little Food Network.
 Once you have the apples chopped, add them to your crock pot along with all of the other ingredients. Mix well. Cover and cook on low for 10 hours, stirring occasionally. This is going to take all day, so it's a great time to get lots of other chores done. I did even leave it for a couple of hours and went grocery shopping. So you don't have to stay right on top of it. Just go by every once in a while and stir.
Uncover at the end of the 10 hours and puree it with an immersion blender. If you don't have one, you can always put it into your regular food processor or blender; just be careful and cover the lid with a towel as hot foods may have a tendency to spew. Once it is blended smooth, turn the temperature up to high and cook it for another hour or so.
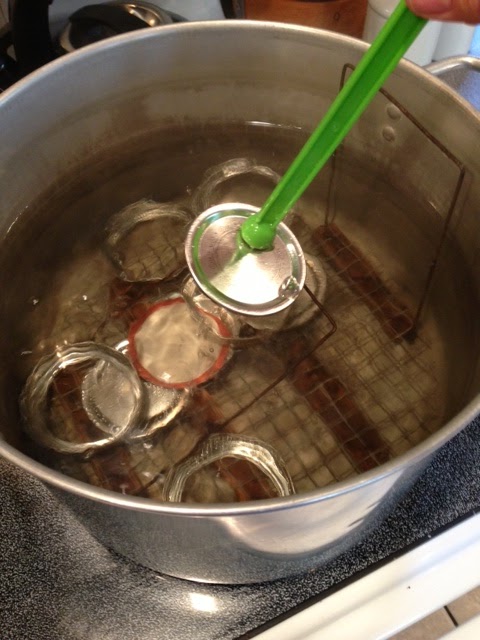
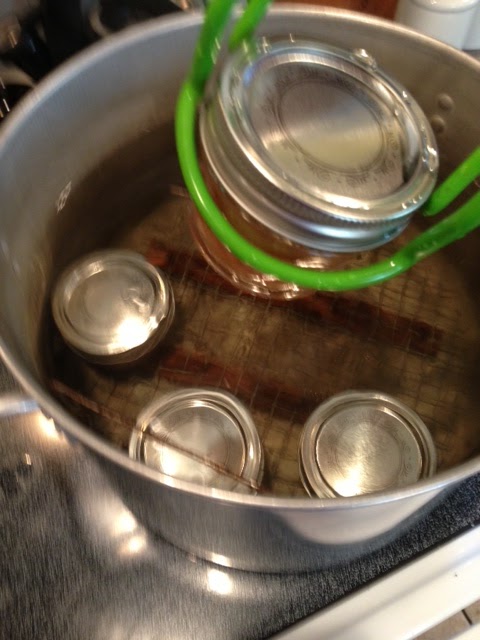
 In the meanwhile, heat up your water and sterilize your jars for a Hot Water Bath. Spoon the apple butter into the jars and leave about a 1/4 inch headspace. Process in a Hot Water Bath for 10 minutes. I used 1/2 pint jars, and I got 4 jars and then had a little left over just to keep in the fridge.
Although the process was long, it was very easy and it tastes amazing! I will definitely make this recipe again.
So, what do you do when you have a bunch of apples and you are waiting around for 10 hours for your apple butter to cook? You make your own Apple Cider. I was a little skeptical at first, but decided that I didn't really have anything to lose.

This recipe came from Food Network online. Of course I substituted the Splenda for the sugar, so this makes a No Sugar Added recipe.

Add the spices to the pot as well. Boil on high for 1 hour, uncovered; checking/stirring frequently. Then, turn down the heat and simmer for 2 hours, covered.
Take off heat and cool. This may take a while, but definitely let it cool completely, since you will need to be handling the mixture.
Remove the spice pouch, if used, and then mash the mixture with a potato masher until it gets to a pulp consistency.

Pour the pulp into a strainer over a large bowl. Allow the juice to drain into the bowl. You may want to "work" the pulp through the strainer with a wooden spoon or spatula. If you only have a small strainer, you may have to do this in batches.
Once the juice has drained, put remainder of pulp into doubled up cheesecloth and squeeze over bowl. If you want a clearer liquid, you may want to restrain the cider by putting a cheese cloth into the strainer. You can store the cider in an airtight container in the fridge for 1 week or you can freeze it.
 Just like the apple butter, this recipe wasn't really hard, it just had quite a few steps and takes several hours. If I did it again, I might try the second straining, in order to use it to drink. I was principally making this batch to cook with, so the thicker cider was okay with me.
However, when I was at the grocery store this weekend, I did find No Sugar Added Apple Cider, so unless you are just in a mood to make apple cider, or you have a lot of apples to use up, it might be easier to just buy some.
After finishing up the cider, I was getting closer to the hot water bath stage of my apple butter. I started thinking, that if I was going to heat up the water, I might as well make some apple jam and do the hot water bath at the same time. After all, I still had apples left. I remembered the spiced pear jam that I had made a month or so ago, and thought maybe I could make some "apple pie" jam, if I added the cinnamon, cloves and maybe a little nutmeg to the apples.

So, I just made the same recipe that I did for the pear jam, substituting the apples. I used exactly the same quantities. The only thing extra I added was just a sprinkle of nutmeg...just because I love nutmeg. Just like all of the jams you make with Splenda, this is a No Sugar Added recipe, because of the natural sugars in the fruit.
 A 10 minute hot water bath and you can see that it came out beautiful in my little jam jars. I had some the other day on my English muffin and peanut butter for breakfast and it tastes just like apple pie filling.
Well... apple turnovers, apple butter, apple cider, apple pie jam, apple cake and 2 recipes of caramel apple cupcakes... Whew! It was quite the weekend, but I still have apples left! The apple pie jam was awesome, so I am thinking another batch is called for; and maybe another batch of apple butter. Hmmmm... maybe some Christmas gifts.

Although the process was long, it was very easy and it tastes amazing! I will definitely make this recipe again.
So, what do you do when you have a bunch of apples and you are waiting around for 10 hours for your apple butter to cook? You make your own Apple Cider. I was a little skeptical at first, but decided that I didn't really have anything to lose.

This recipe came from Food Network online. Of course I substituted the Splenda for the sugar, so this makes a No Sugar Added recipe.
- 10 apples, quartered
- 3/4 c. Splenda
- 4 T. cinnamon or 4 cinnamon sticks
- 4 T. allspice or 4 T. whole allspice

Add the spices to the pot as well. Boil on high for 1 hour, uncovered; checking/stirring frequently. Then, turn down the heat and simmer for 2 hours, covered.
Take off heat and cool. This may take a while, but definitely let it cool completely, since you will need to be handling the mixture.
Remove the spice pouch, if used, and then mash the mixture with a potato masher until it gets to a pulp consistency.

Pour the pulp into a strainer over a large bowl. Allow the juice to drain into the bowl. You may want to "work" the pulp through the strainer with a wooden spoon or spatula. If you only have a small strainer, you may have to do this in batches.
Once the juice has drained, put remainder of pulp into doubled up cheesecloth and squeeze over bowl. If you want a clearer liquid, you may want to restrain the cider by putting a cheese cloth into the strainer. You can store the cider in an airtight container in the fridge for 1 week or you can freeze it.
 Just like the apple butter, this recipe wasn't really hard, it just had quite a few steps and takes several hours. If I did it again, I might try the second straining, in order to use it to drink. I was principally making this batch to cook with, so the thicker cider was okay with me.
However, when I was at the grocery store this weekend, I did find No Sugar Added Apple Cider, so unless you are just in a mood to make apple cider, or you have a lot of apples to use up, it might be easier to just buy some.
After finishing up the cider, I was getting closer to the hot water bath stage of my apple butter. I started thinking, that if I was going to heat up the water, I might as well make some apple jam and do the hot water bath at the same time. After all, I still had apples left. I remembered the spiced pear jam that I had made a month or so ago, and thought maybe I could make some "apple pie" jam, if I added the cinnamon, cloves and maybe a little nutmeg to the apples.

So, I just made the same recipe that I did for the pear jam, substituting the apples. I used exactly the same quantities. The only thing extra I added was just a sprinkle of nutmeg...just because I love nutmeg. Just like all of the jams you make with Splenda, this is a No Sugar Added recipe, because of the natural sugars in the fruit.

Well... apple turnovers, apple butter, apple cider, apple pie jam, apple cake and 2 recipes of caramel apple cupcakes... Whew! It was quite the weekend, but I still have apples left! The apple pie jam was awesome, so I am thinking another batch is called for; and maybe another batch of apple butter. Hmmmm... maybe some Christmas gifts.